ApeX Staking 3.0, supporting $APEX and $esAPEX pools, is a robust mechanism for generating passive income, enabling ApeXers to benefit from amplified earnings by receiving a share of ApeX Protocol revenues that is accrued from trading fees.
As recently announced, with the upcoming launch of ApeX Omni and our very own meme token, we are rewarding all Staking Program participants, who are active stakers at the time of the snapshot, with the token airdrop! Yes, you heard that right — stake with us and reap those extra sweet rewards!
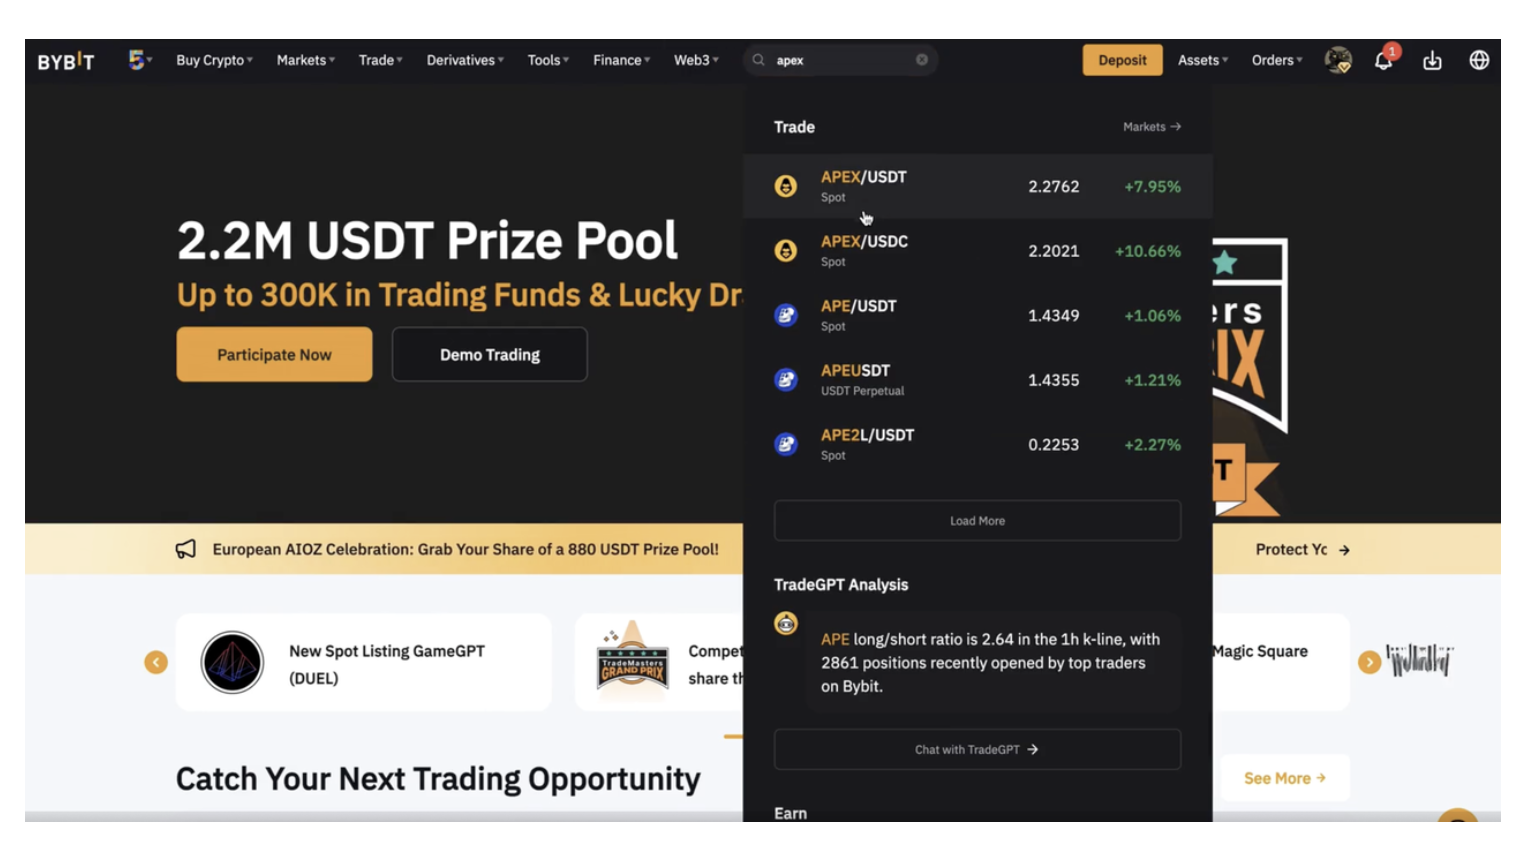
Buying $APEX from Bybit
Step 1: Go on the Bybit homepage.

Step 2: Search for the token that you want to buy, in this case, $APEX.
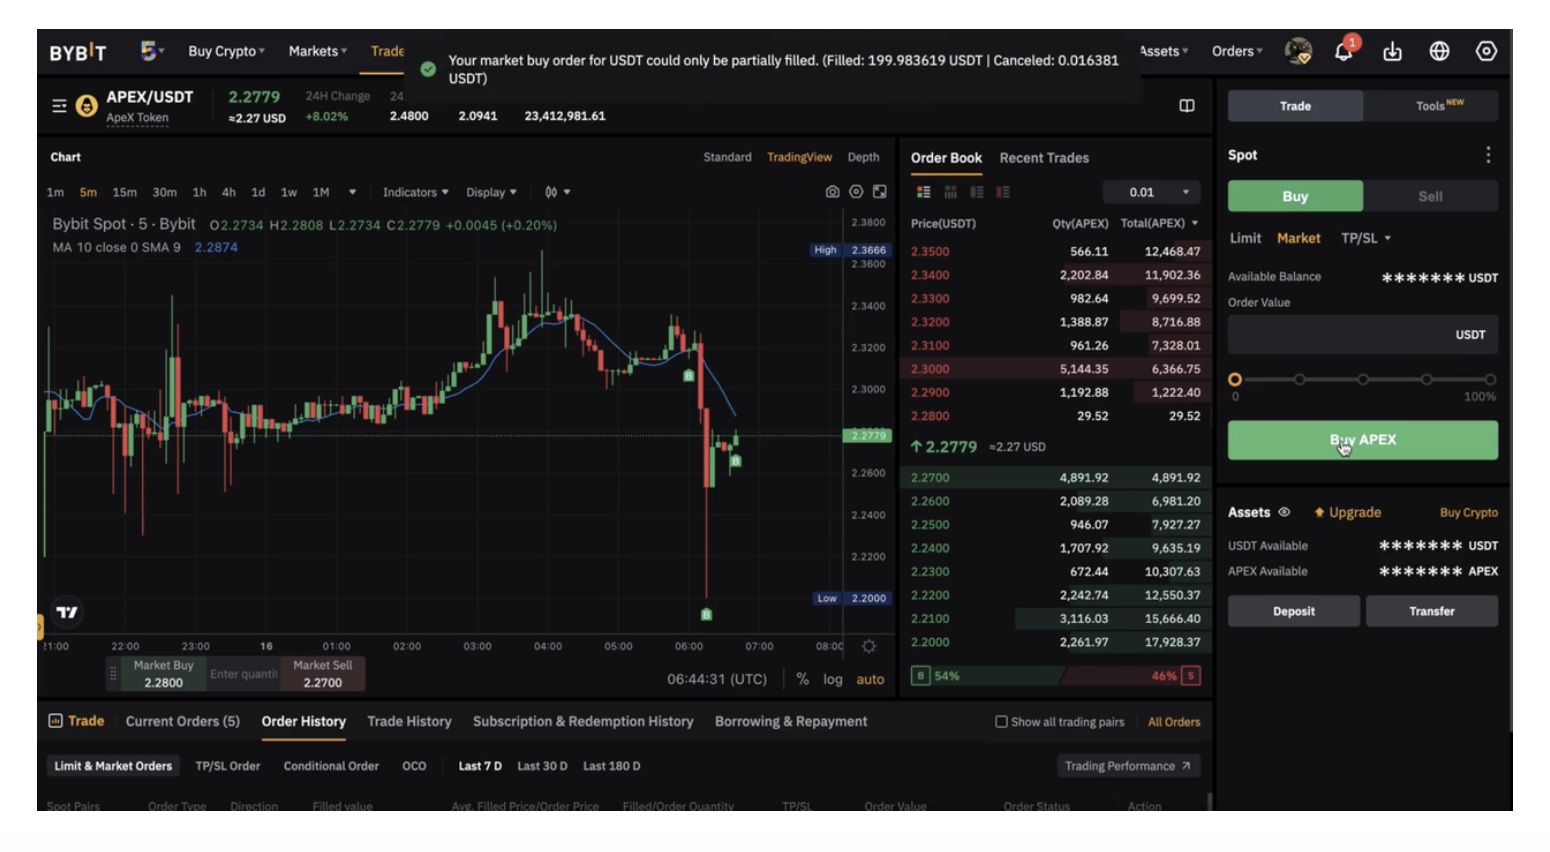
Step 3: You will reach the order book page.
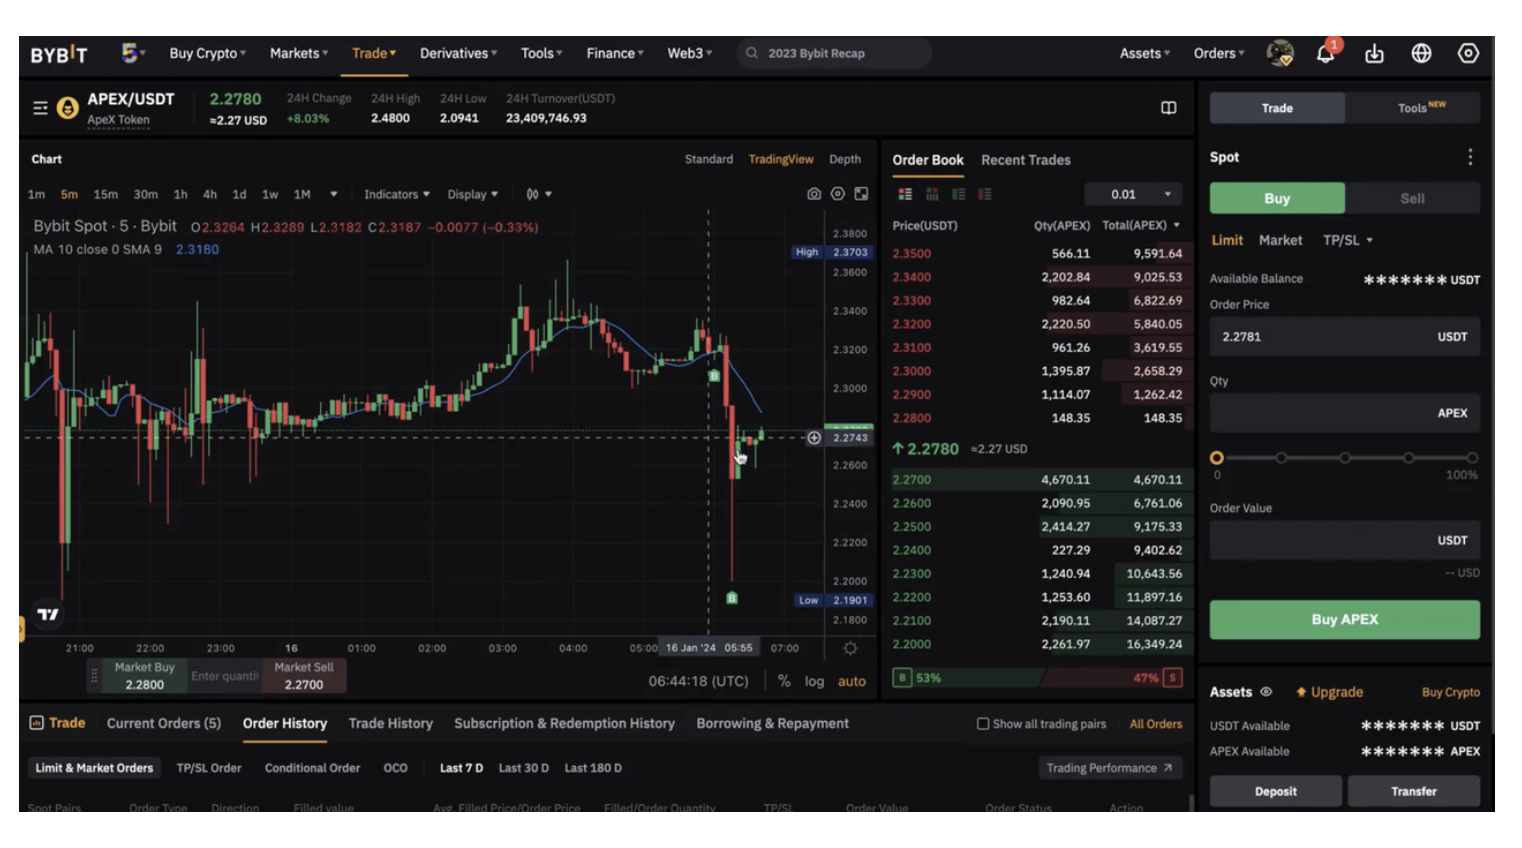
Step 4: Select Market Order and type in the order value that you wish to buy.
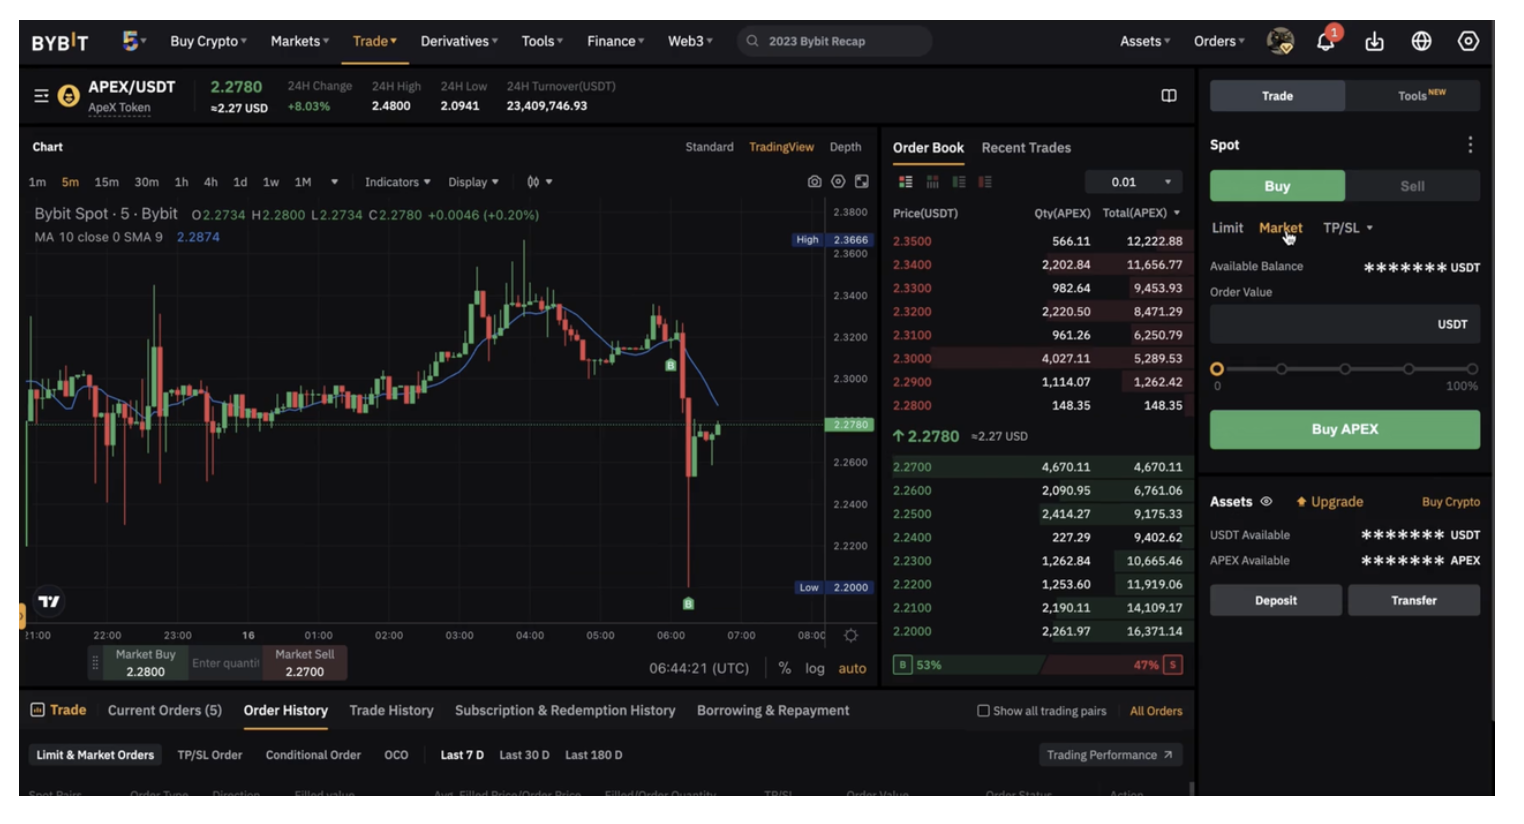
Step 5: Please make sure that all of your information is accurate before clicking on Buy APEX to proceed.
Step 6: Click on Assets at the top right-hand corner of the home page and go to Withdraw.
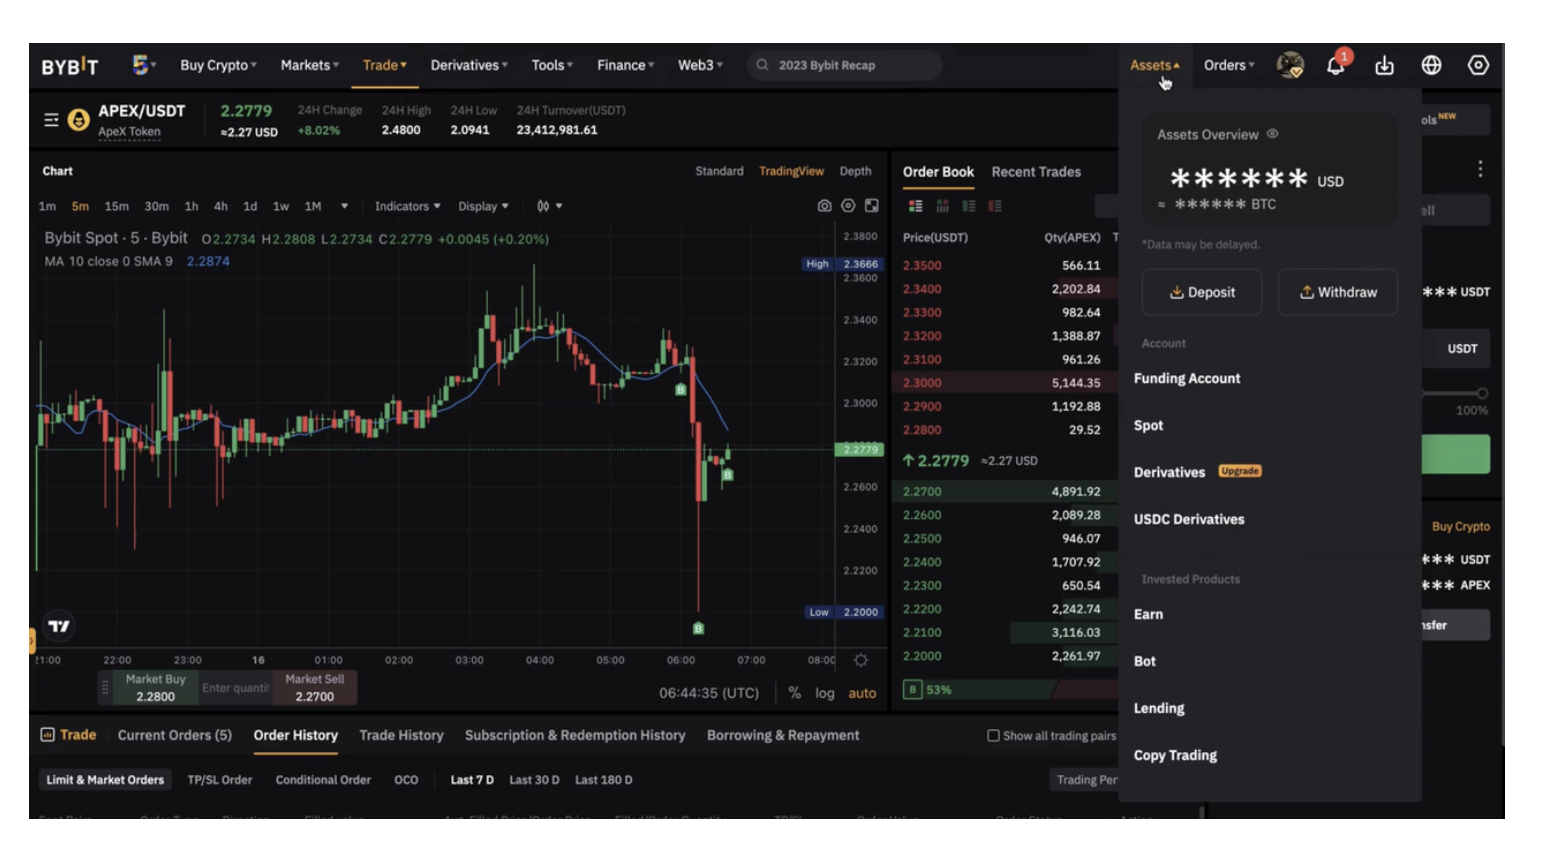
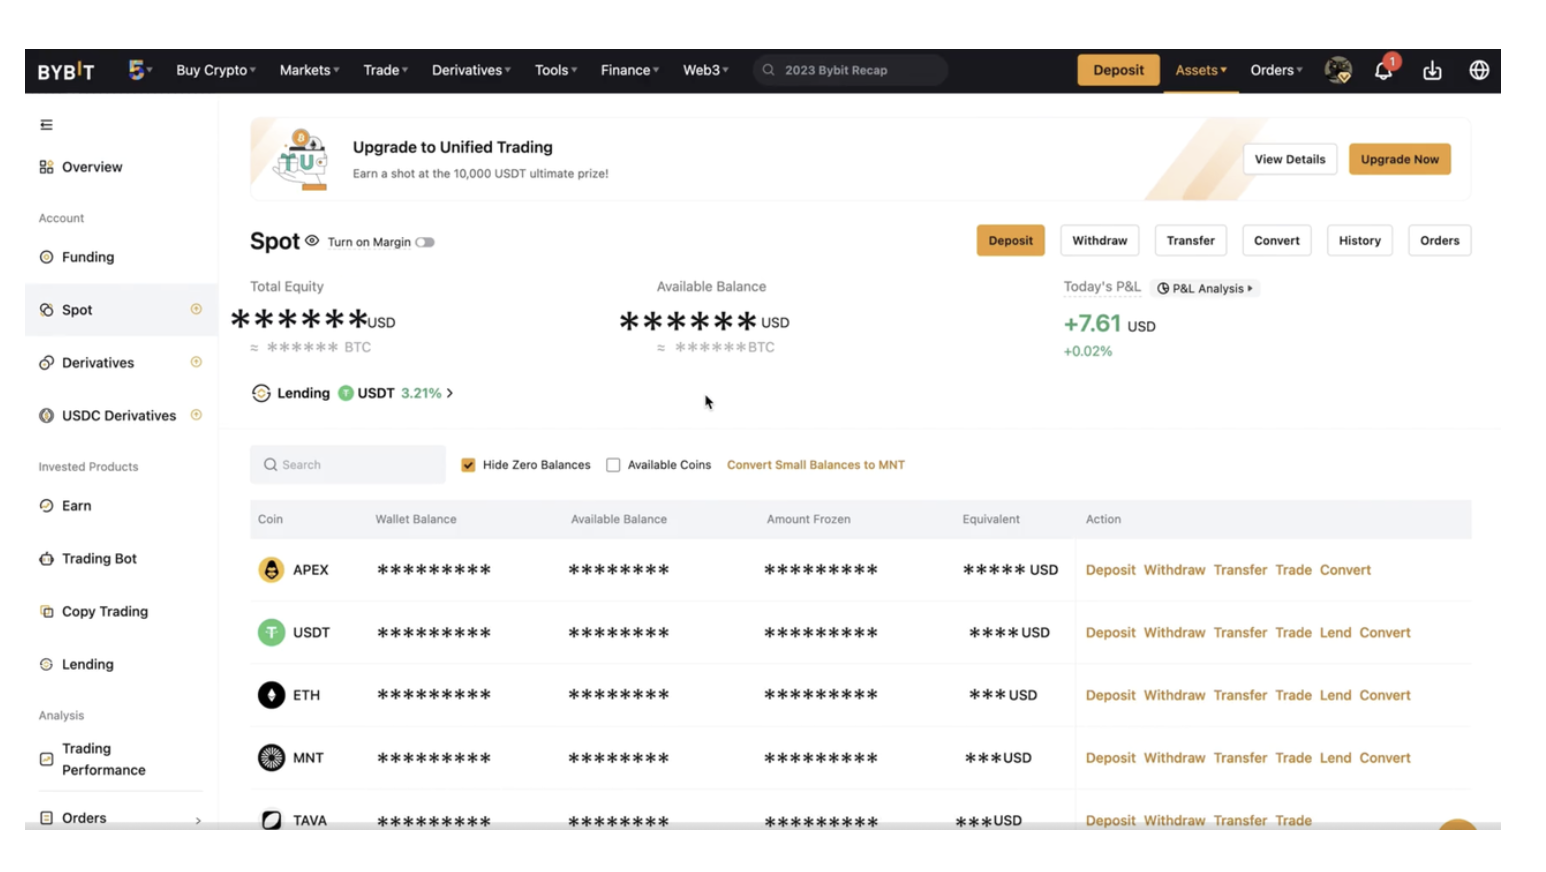
Step 7: On the Assets Overview page, click on Spot.
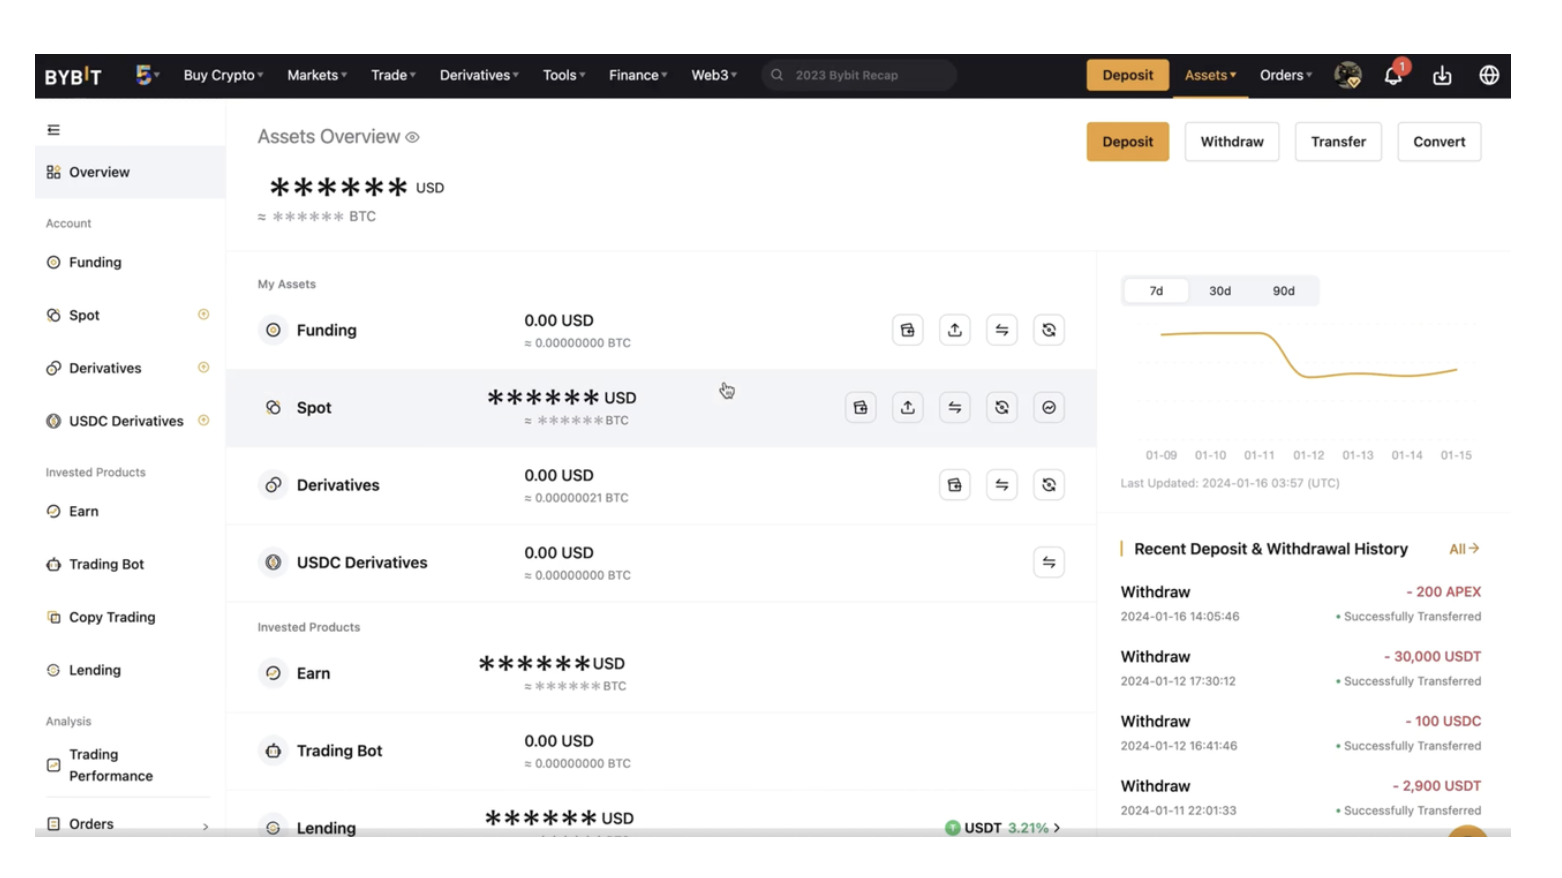
Step 8: Click on Withdraw in the column of the currency you want to withdraw.
Step 9: Select the coin to withdraw as well as the withdrawal wallet address.
Enter your wallet address to which you want the funds to be transferred directly in the Wallet Address field.
Warning: Please do not key in the token contract address or any other addresses that are not your personal wallet address to prevent loss of funds.
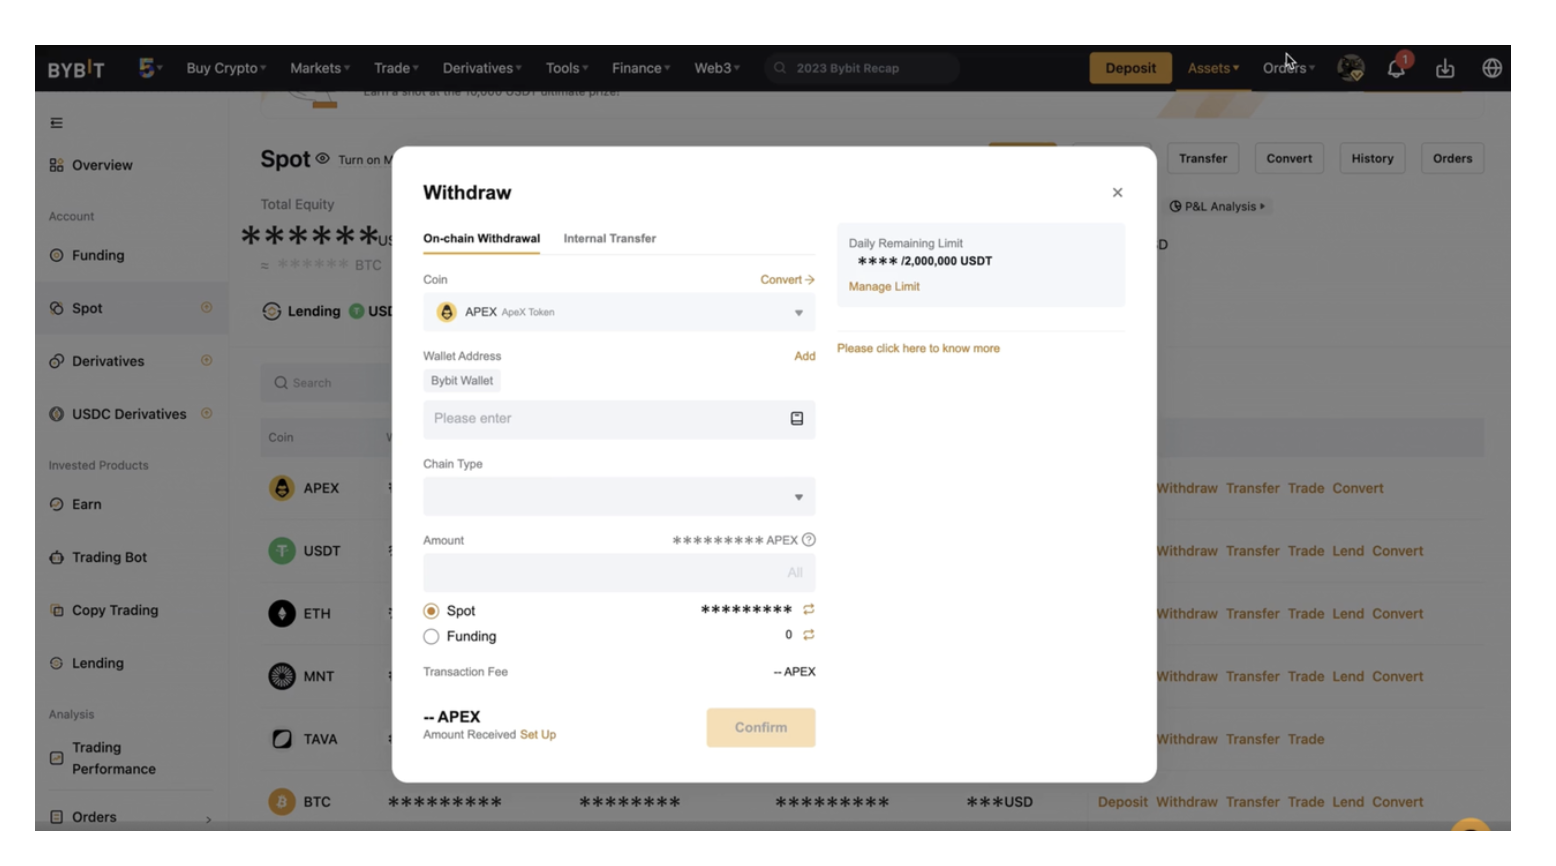
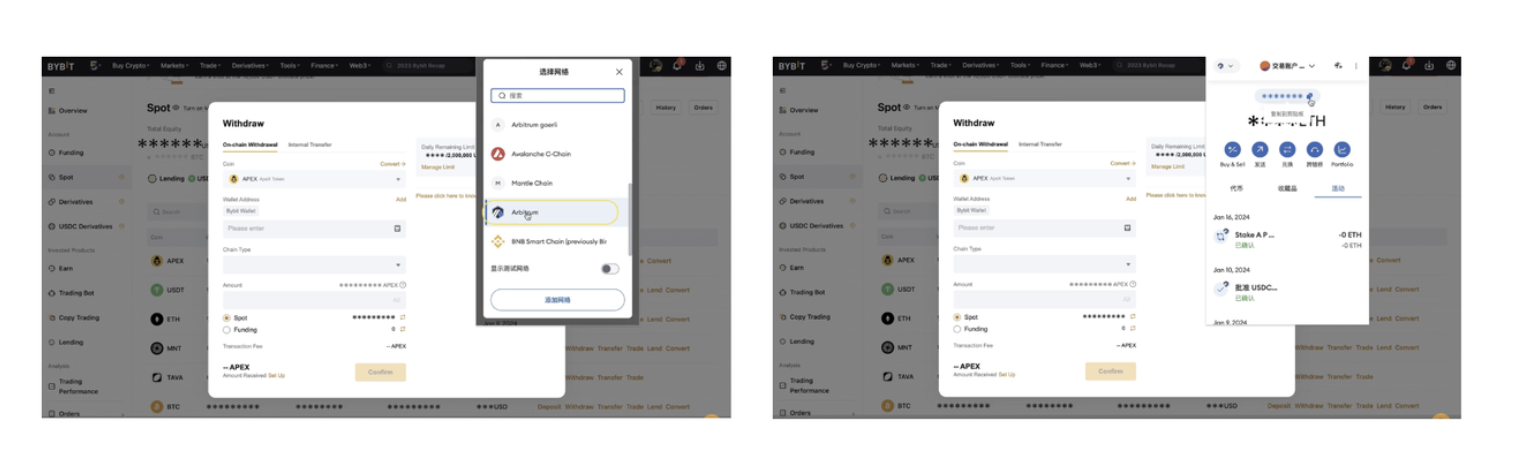
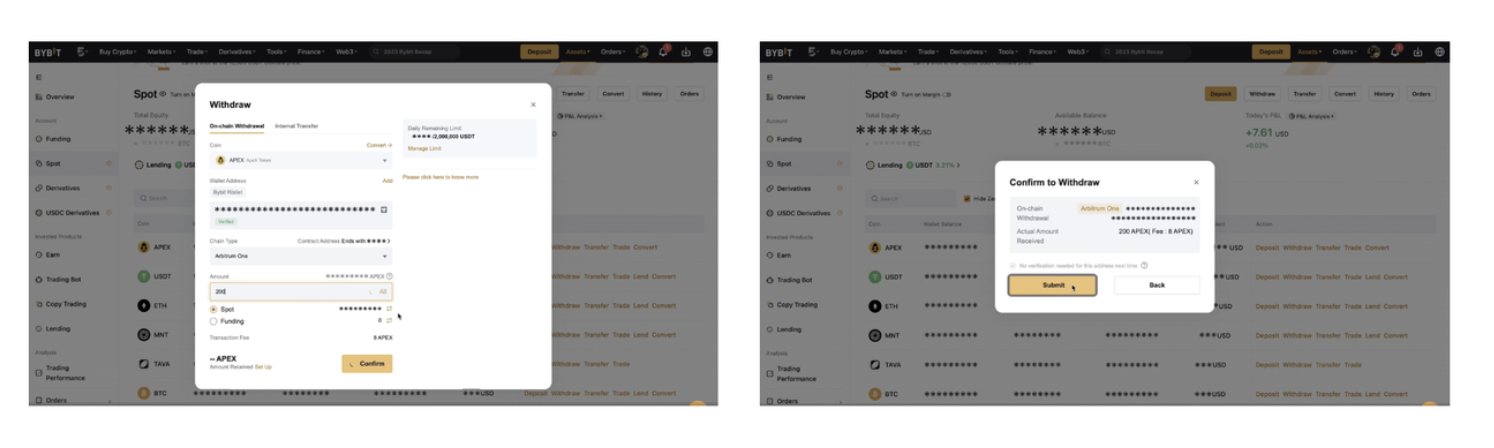
Step 10: Select the type of chain you prefer. You will see the withdrawal fee amount for each blockchain network accordingly.
Step 11 : Click on Submit.
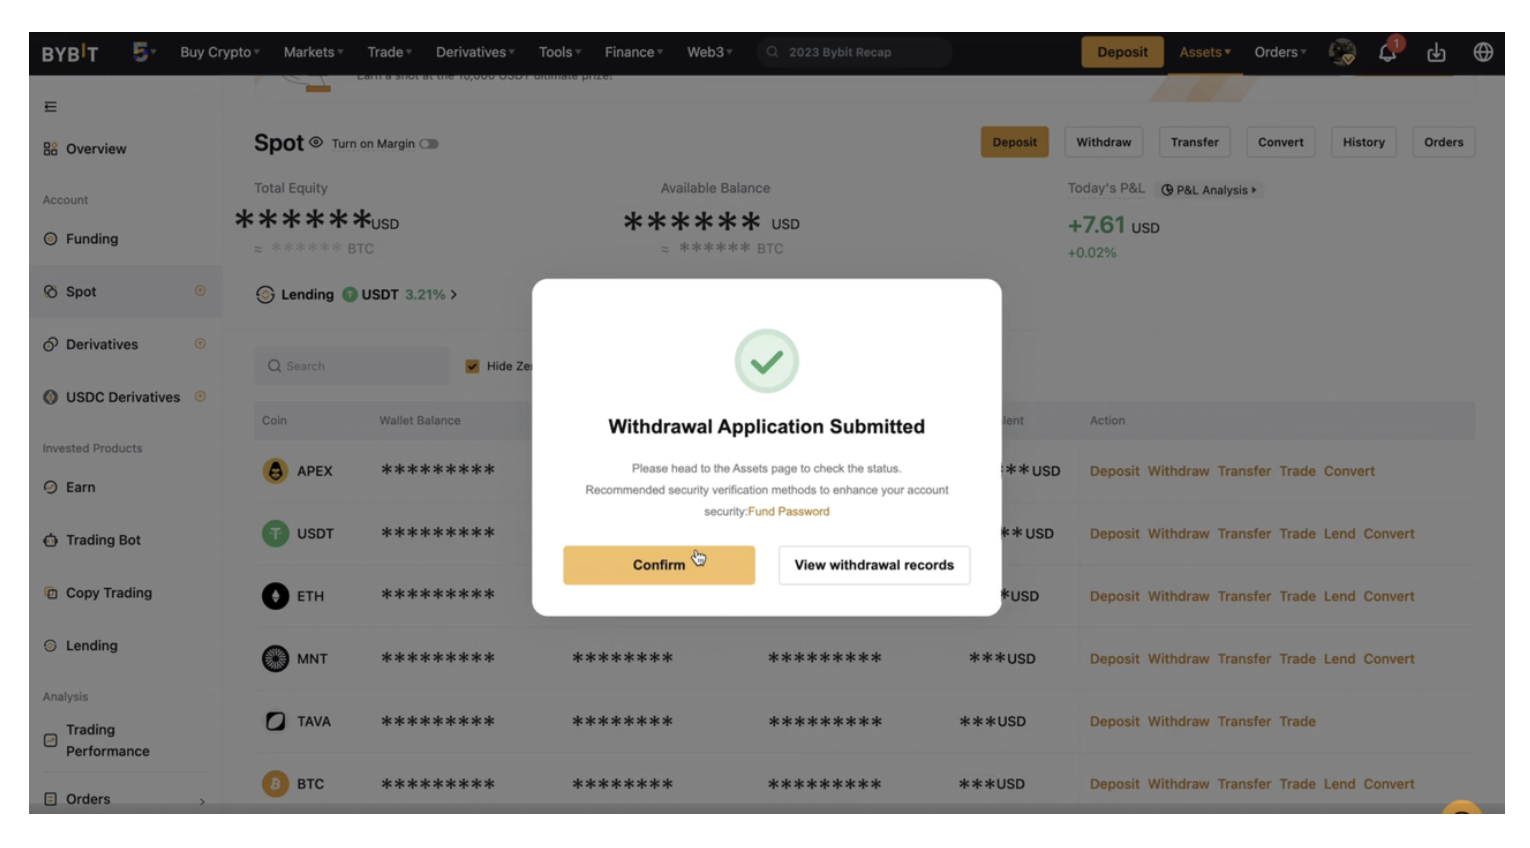
Step 12: Your withdrawal request has been successfully submitted!
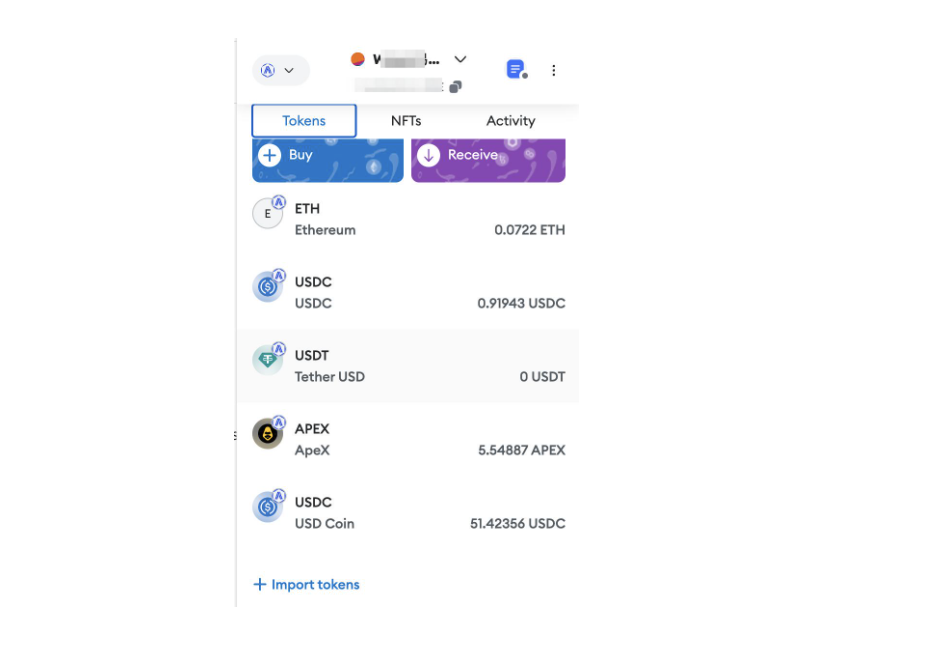
Step 13: After your withdrawal is successful, you will receive your $APEX tokens in your Metamask wallet. To view the token balance in your wallet, please click on "+Import tokens" and key in this address, "0x61A1ff55C5216b636a294A07D77C6F4Df10d3B56"; Then click "Next".
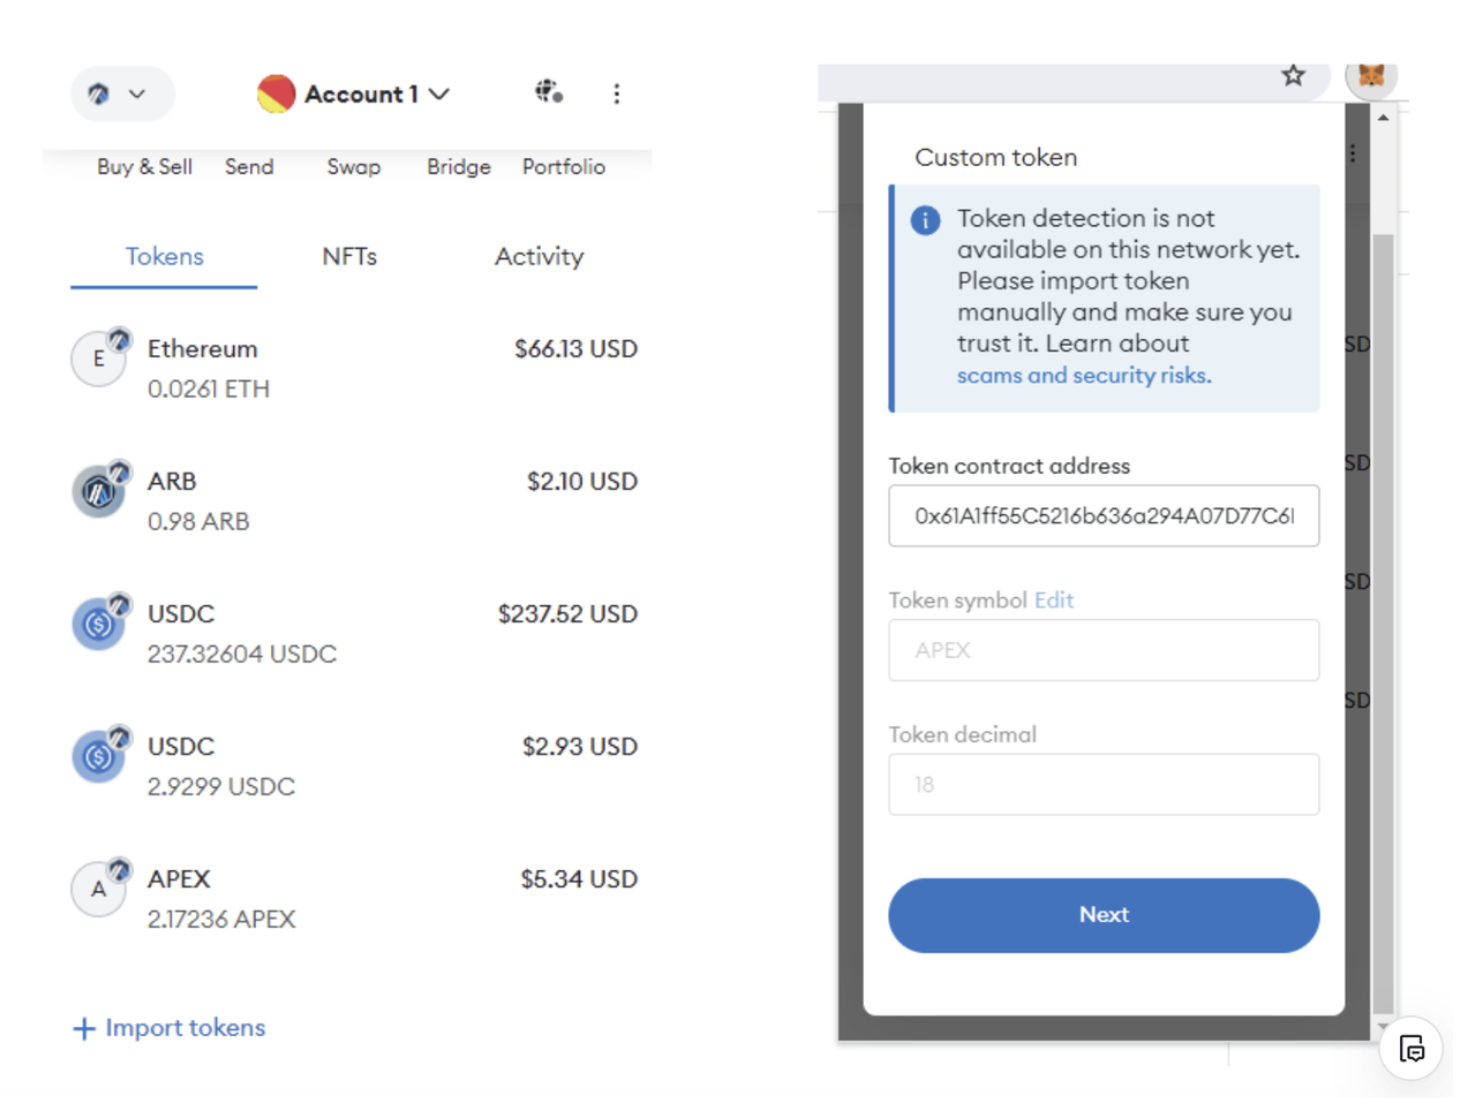
Step 14: You will now see your $APEX balance in your Metamask wallet.
Buying $APEX from Camelot
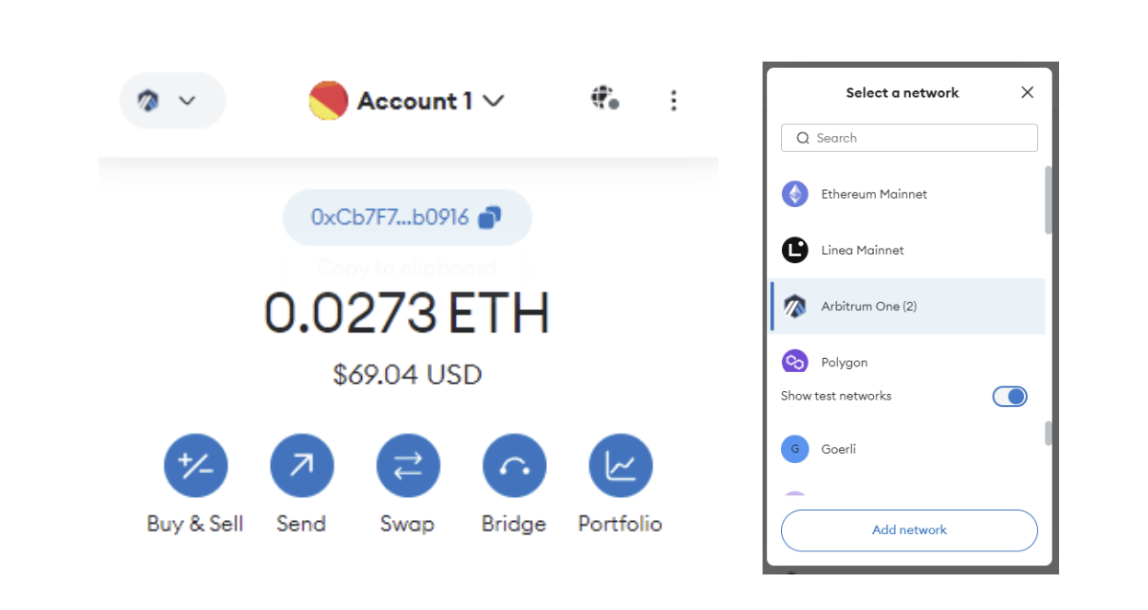
Step 1: Login to your Metamask wallet and ensure that you have enough $ETH balance to purchase $APEX and to pay for gas fees. Change your chain to Arbitrum in your Metamask Wallet.
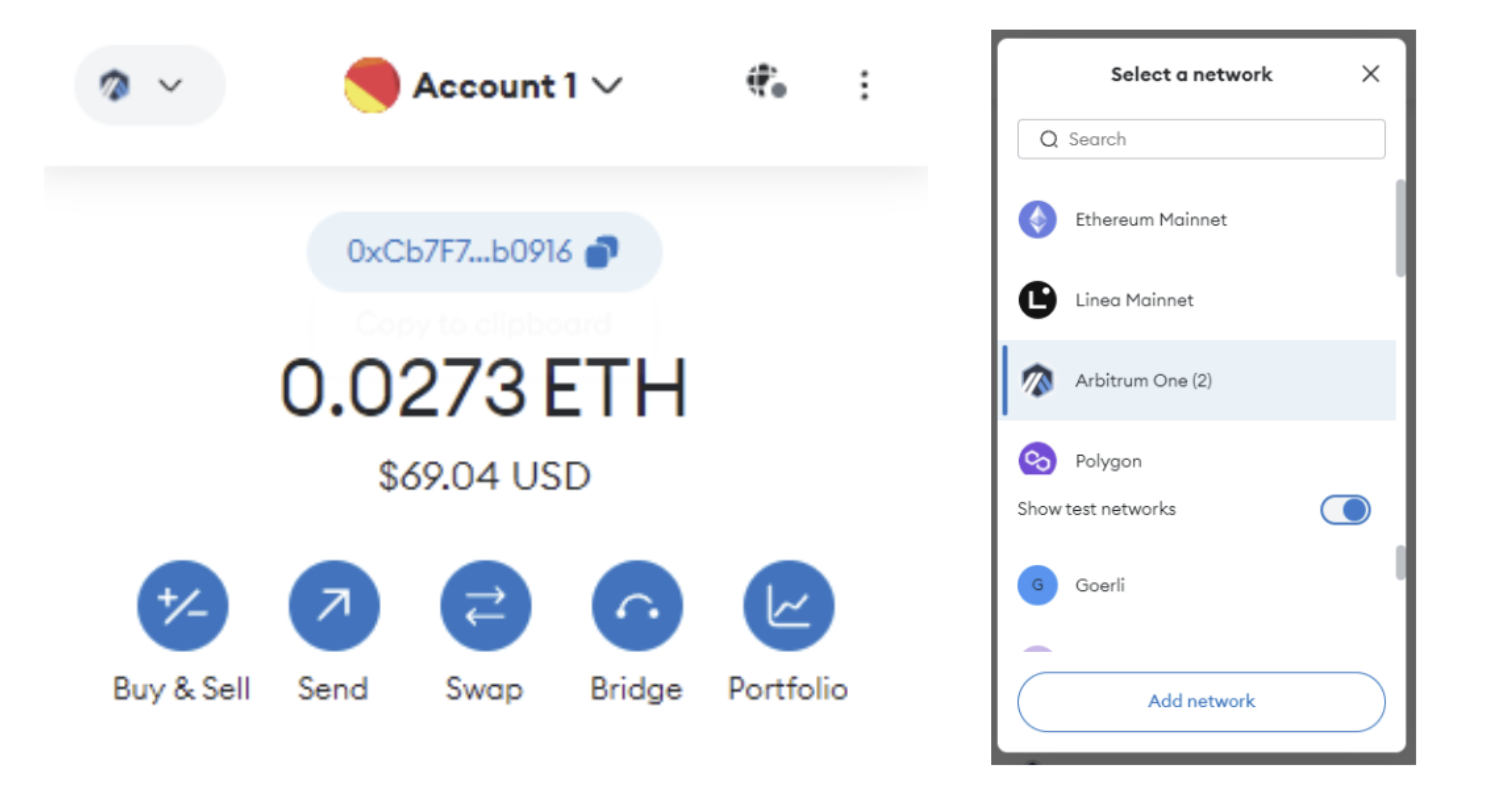
Note: If you do not have Arbitrum in your Metamask wallet, please add it by using this link https://chainlist.org/chain/42161 then click on "Add to Metamask".
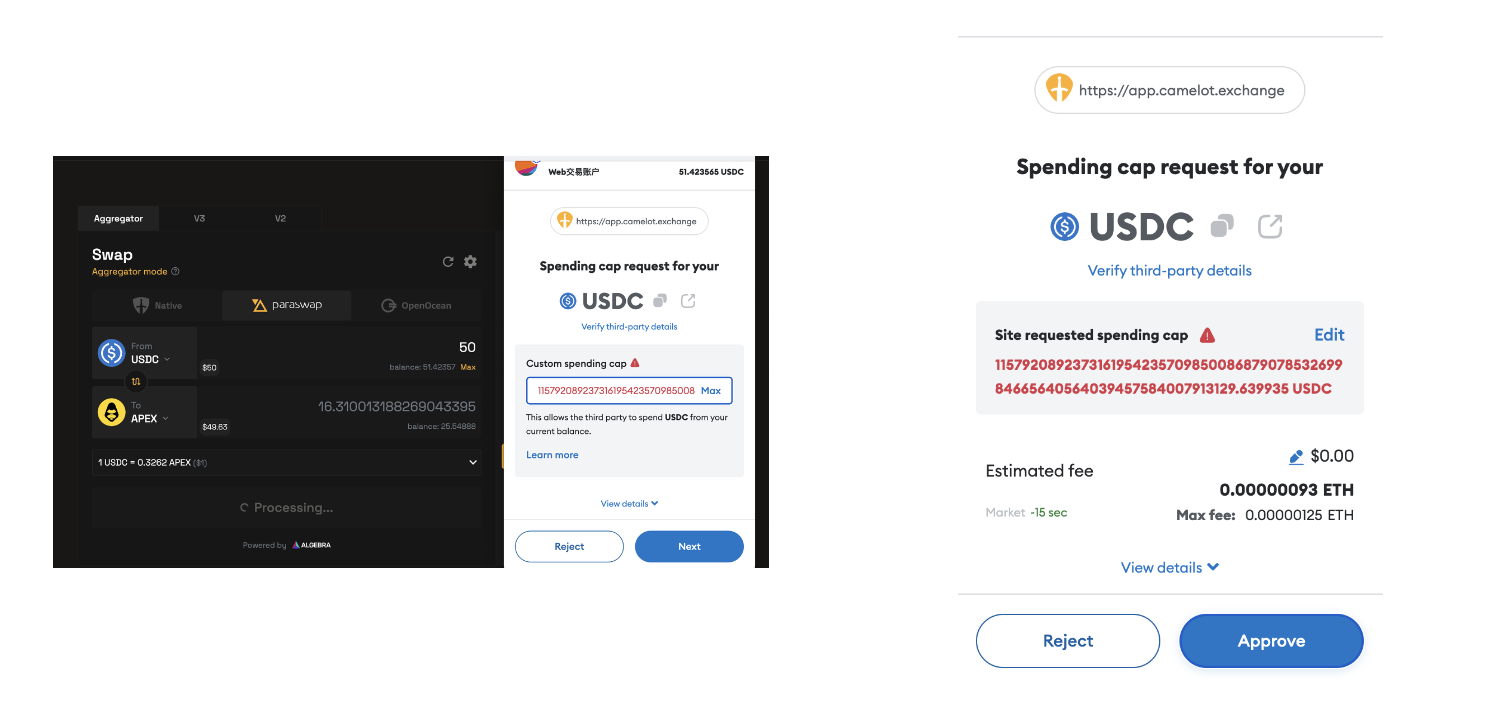
Step 2: Head to Camelot using this specific URL here, the $APEX token will be pre-selected automatically (you won't need to search or select it manually).
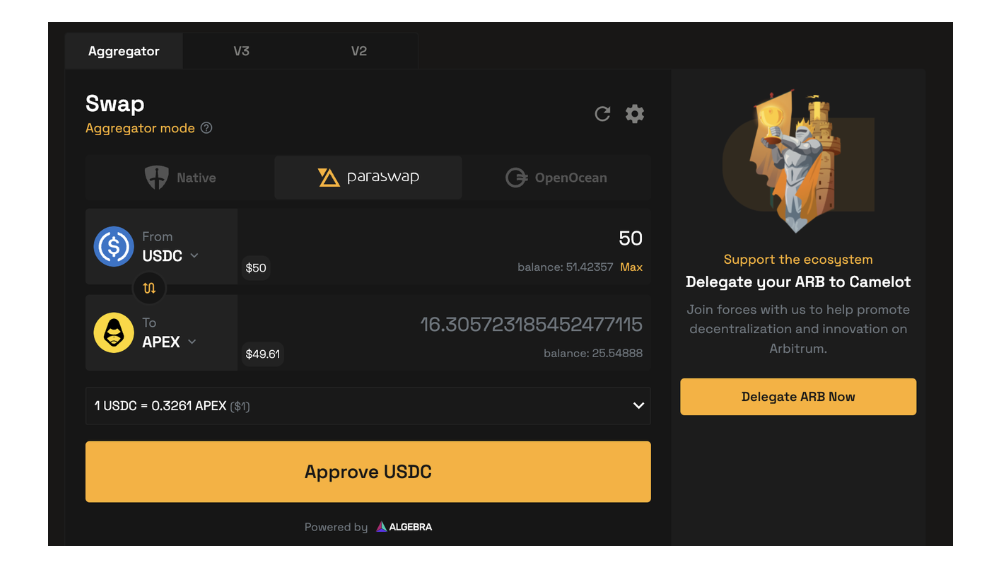
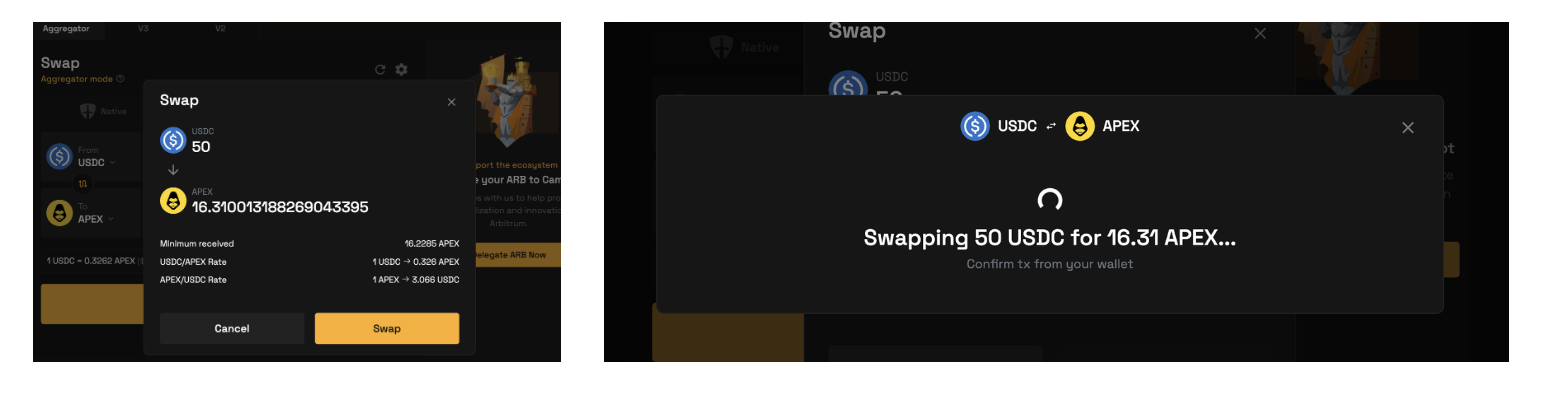
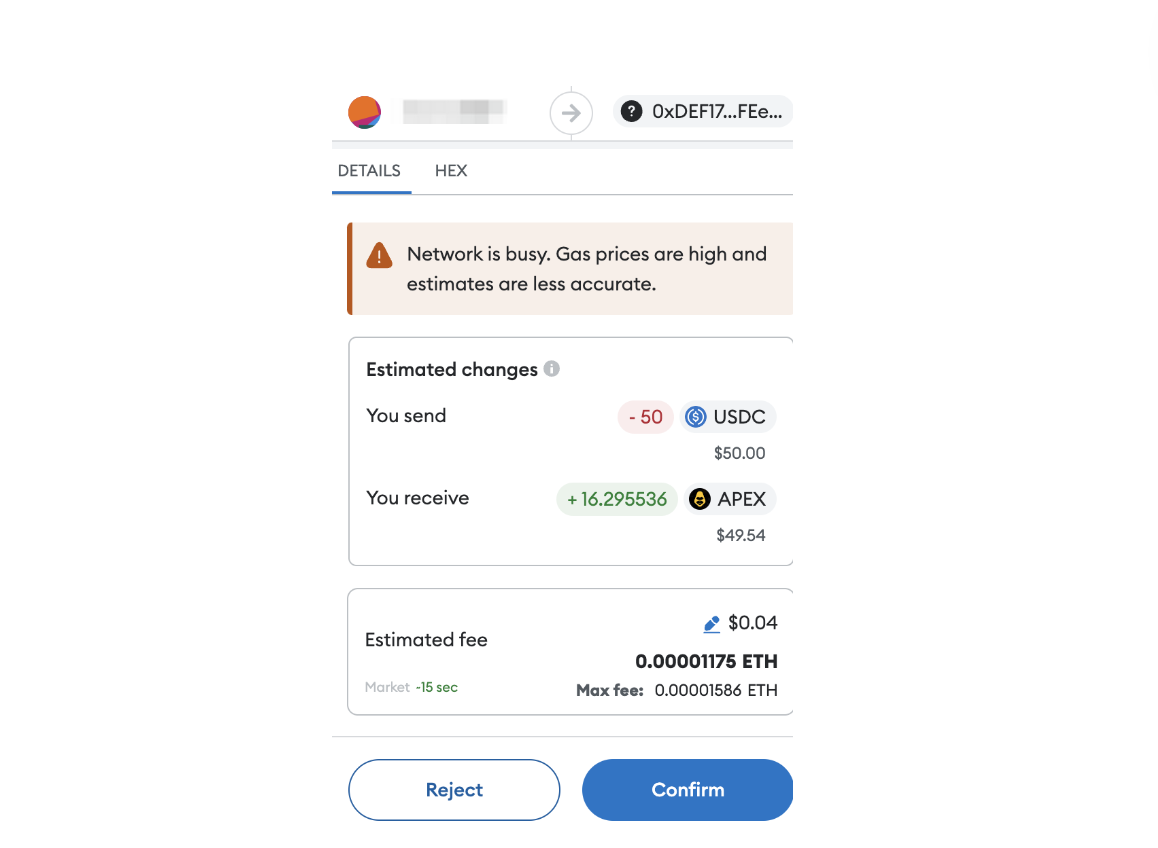
Step 3: Input how much $APEX you would like to receive. Then click on "Swap". Note: Please ensure you have enough balance to pay for gas fees. Then click on "Confirm" Swap. A transaction approval request will appear in your Metamask wallet widget. Click on "Confirm" to complete the swap.
Once approved, you will be able to view details of the confirmed transaction on the blockchain.
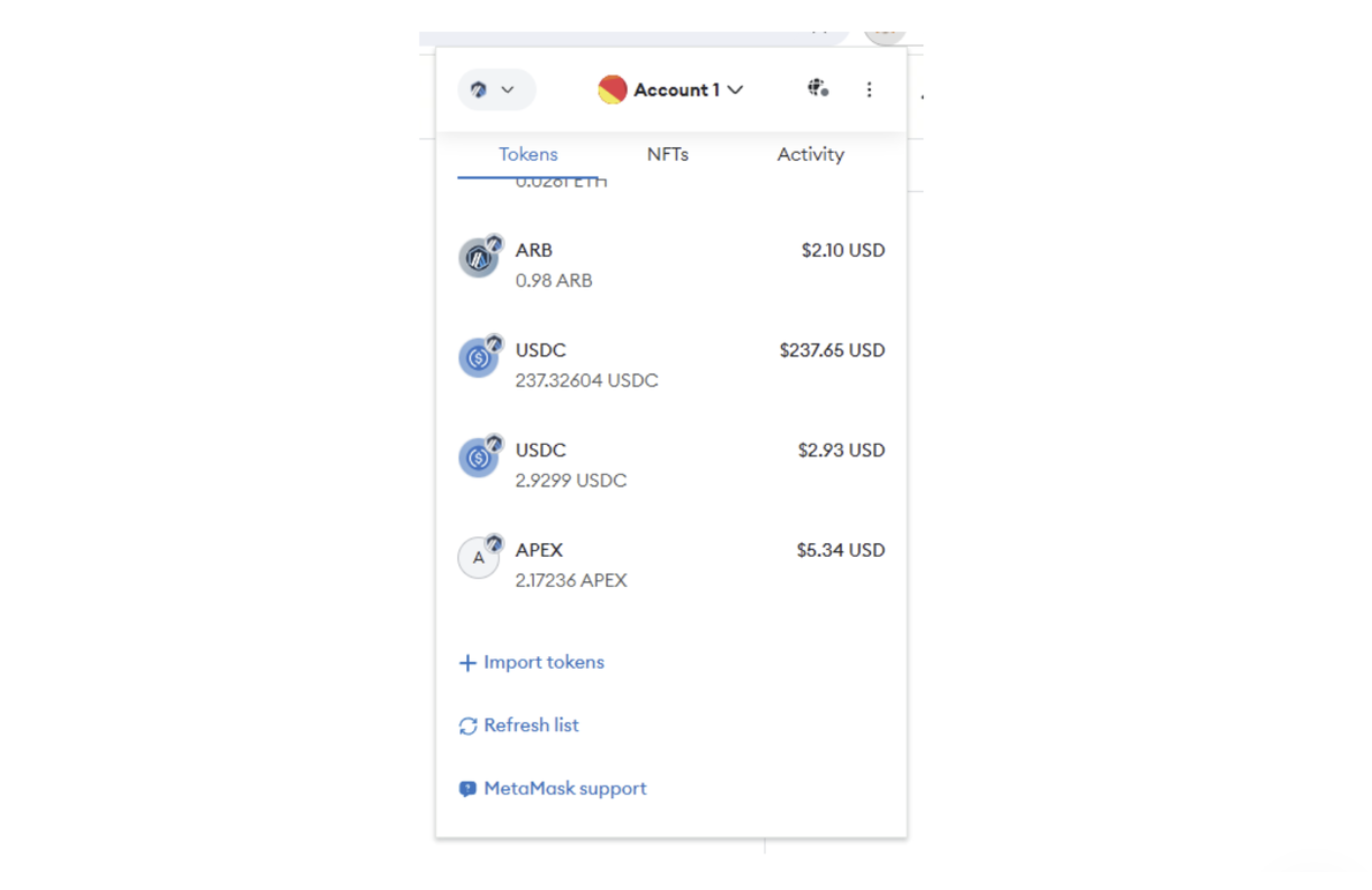
Step 4: Once your transaction is confirmed, you will receive your $APEX tokens in your wallet. To view the token balance in your wallet, please click on "+Import tokens" and key in this address, "0x61A1ff55C5216b636a294A07D77C6F4Df10d3B56 ", then click "Next".
You can now view your $APEX balance in your Metamask wallet.
Staking $APEX/$esAPEX on Web Browser
Step 1: Login to your Metamask wallet and ensure that you are either on the Ethereum or Arbitrum chain, the chain on which you have your $APEX or $esAPEX tokens sent to.
Note: Please make sure you have enough $ETH balance in your wallet to pay for gas fees when making a staking transaction.
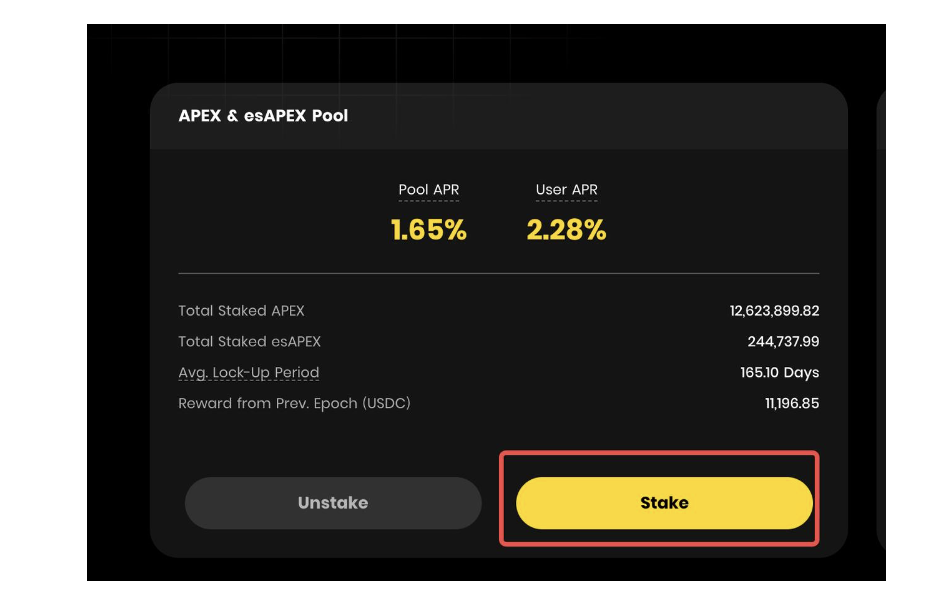
Step 2: Visit ApeX Staking page and click on "Stake".
Step 3: Once the staking window has popped up, click on the dropdown box to select your choice between "$APEX" or "$esAPEX" tokens. Please key in the amount you would like to stake or select "Max" if you would like to stake your entire balance.
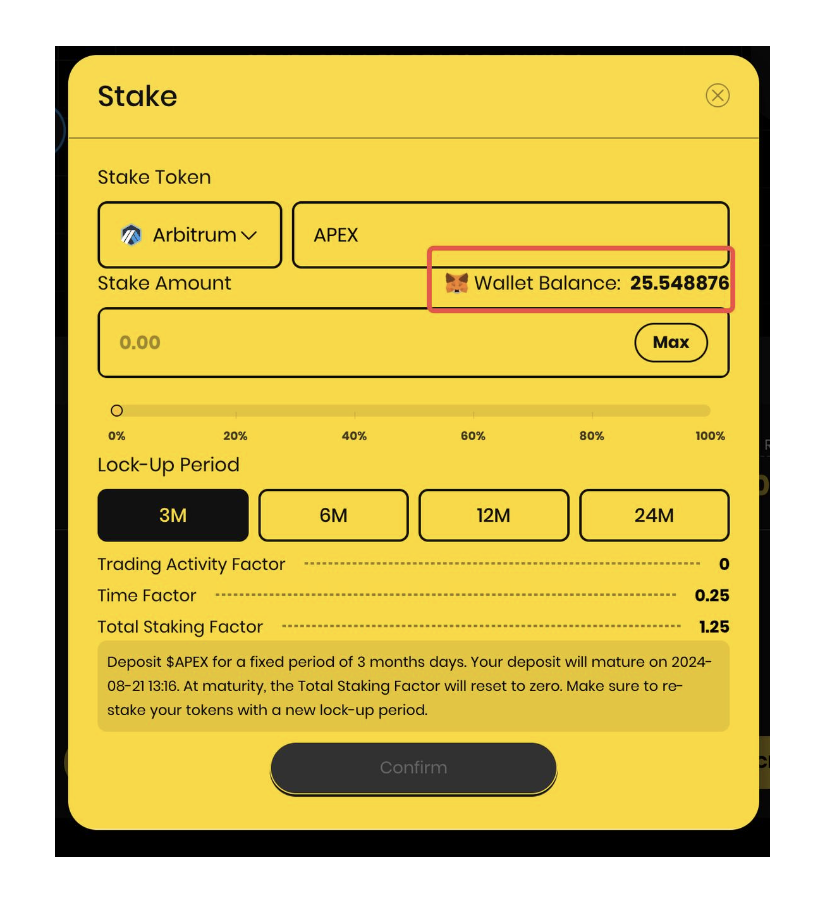
Step 4: Next, pick your preferred lock-up period. You can choose between 3 months, 6 months, 12 months and 24 months to lock up your tokens. Once you have selected your lock-up period, click on "Confirm."
The longer your chosen lock-up period, the higher your USDC allocation.
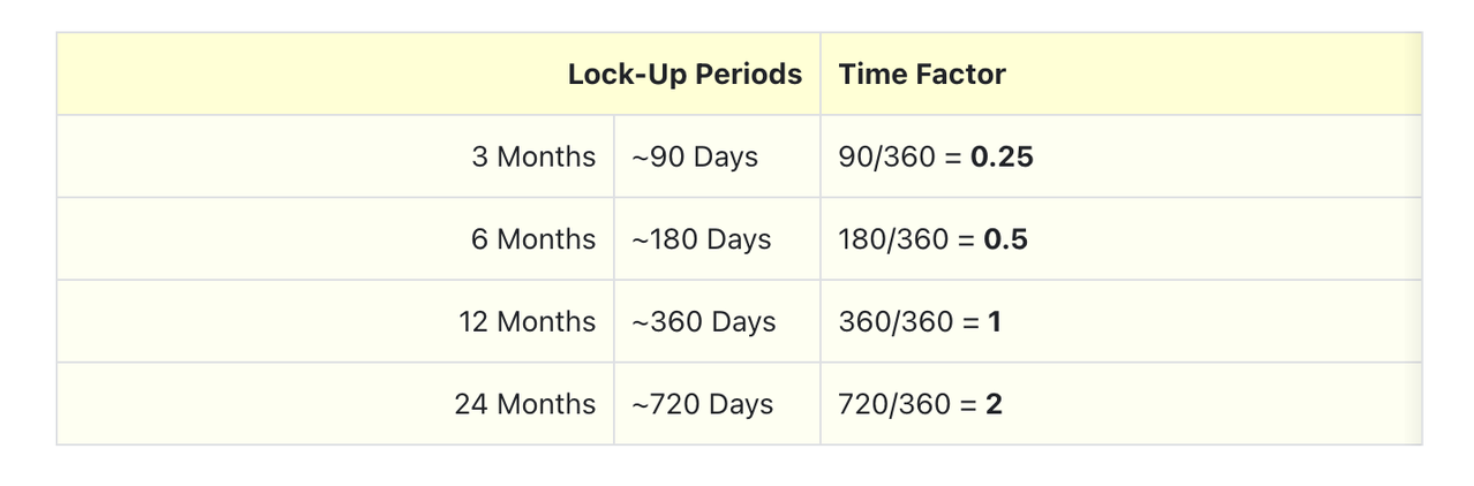
Without considering the Trading Activity Factor, here's how different Lock-Up durations compare in terms of earnings:

Further, please note, once the lock-up period expires, you have to re-stake your tokens (following the same steps as outlined here) and choose a new term to commit your tokens for.
Step 5: A Metamask transaction approval request will pop up. Click on "Next". Then click "Approve".
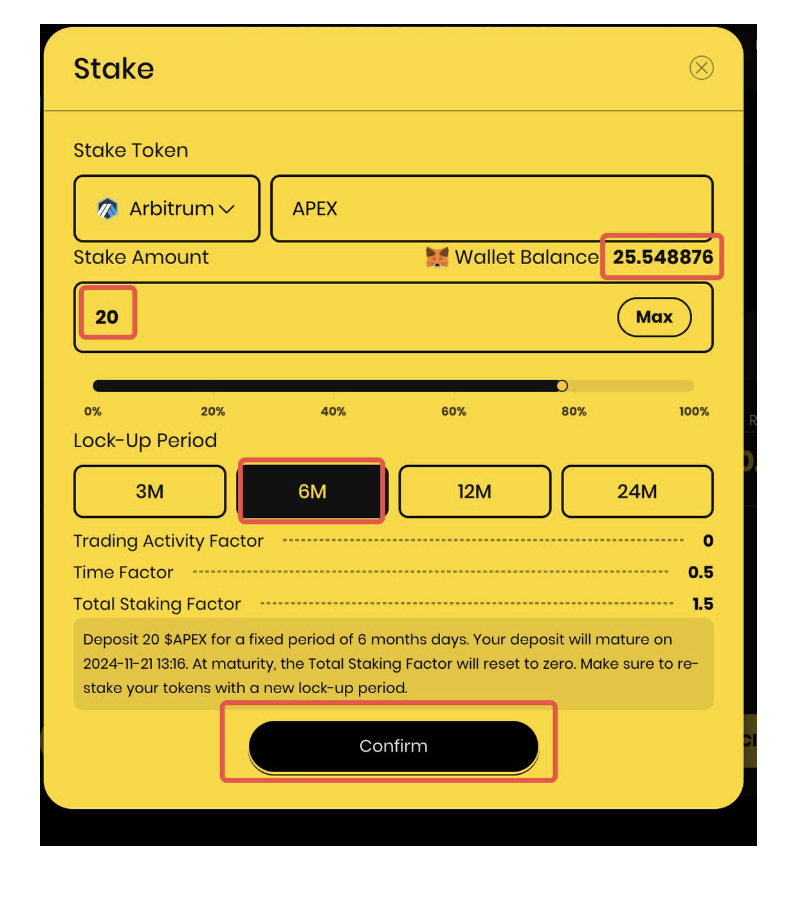
Step 6: Once your transaction is confirmed, you will be taken back to the Staking window. Click on the "Confirm" button.
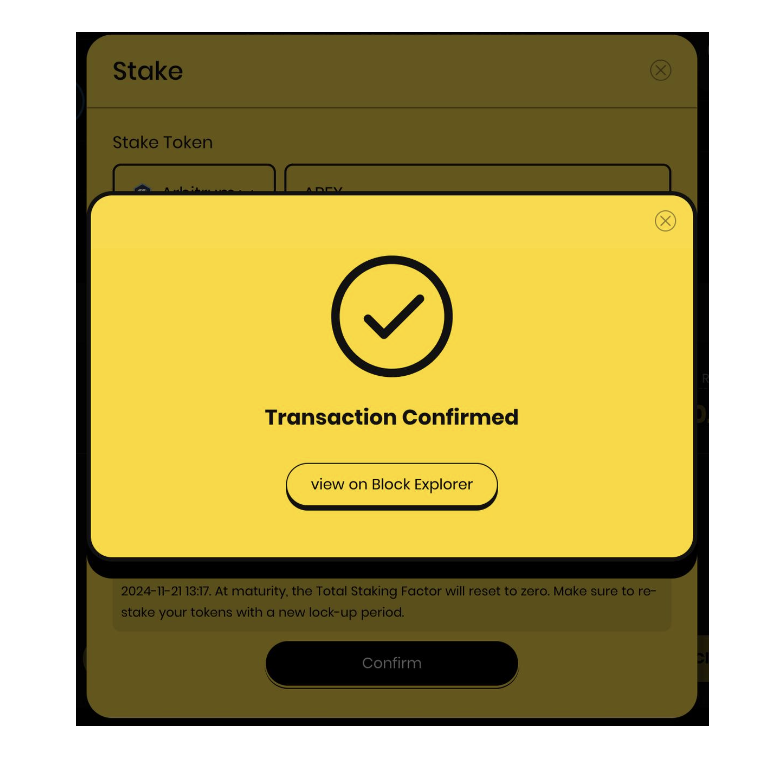
Step 7: A Metamask transaction approval request will pop up. Click on "Confirm" to complete the transaction.
Step 8: You have now successfully staked your $APEX and/or $esAPEX tokens on ApeX.
Staking rewards are updated every Monday at 8AM UTC and distributed every Thursday, 8AM UTC. For a better understanding of how staking rewards are calculated, please refer to our documents here.
Please note that you can claim your staking rewards from the Staking page any time, under the rewards window.
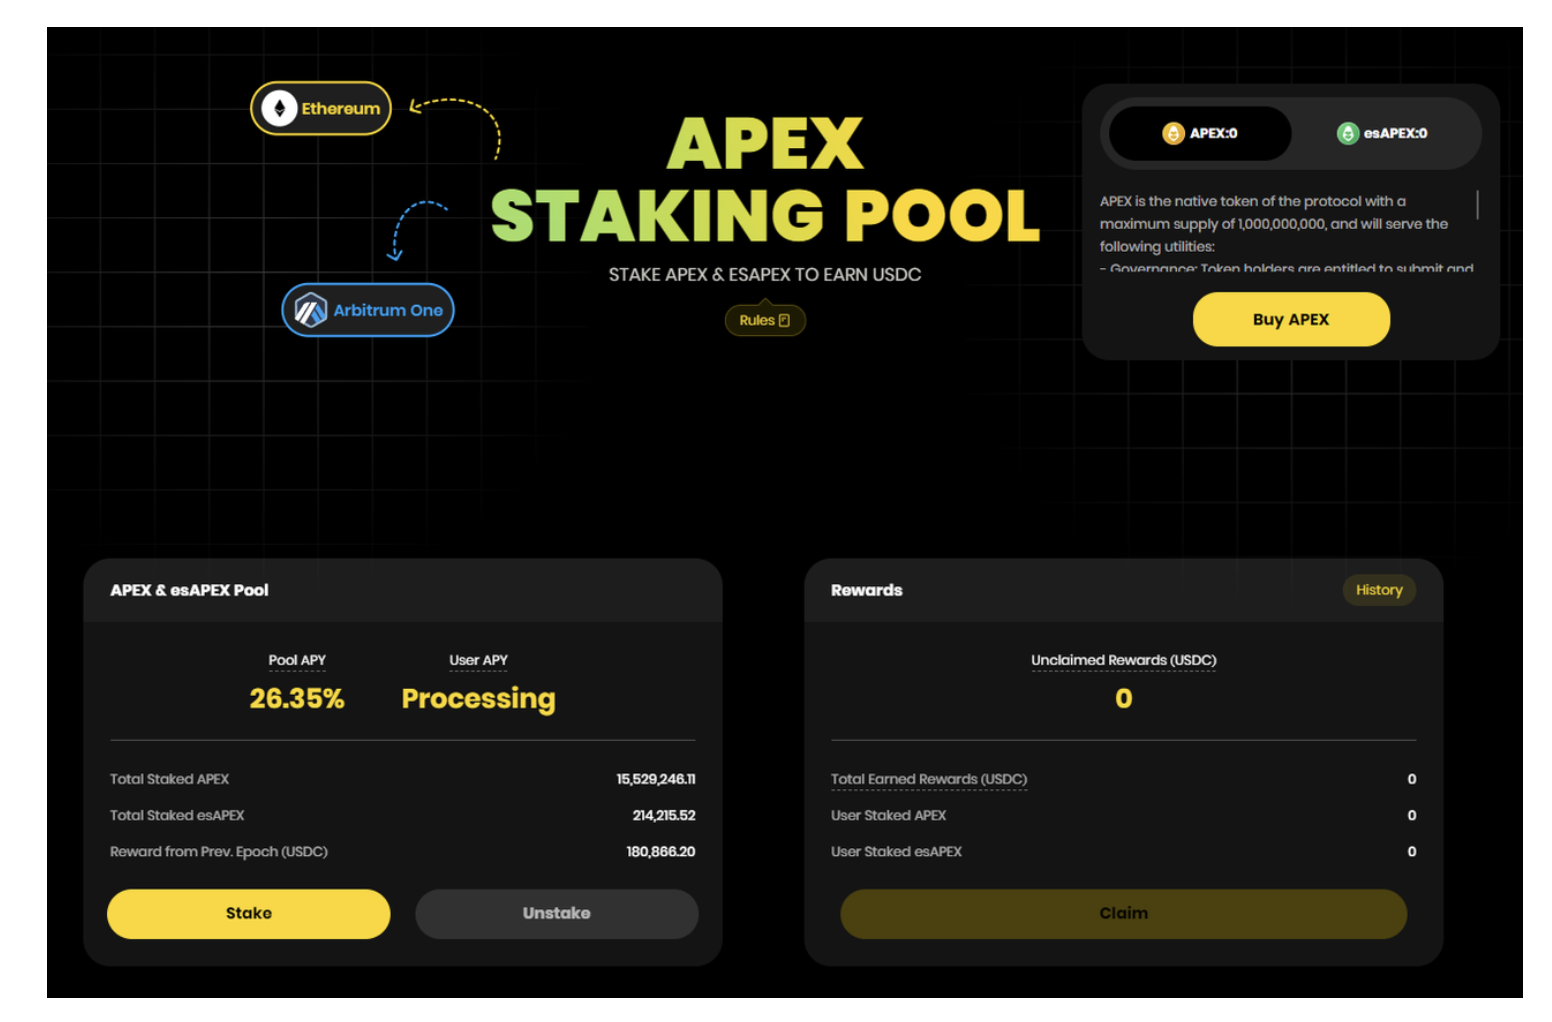
All staking rewards claimed are added to your $USDC account margin on ApeX Pro. You will need to make a withdrawal if you would like to move your rewards to your Metamask wallet.
That's it! You're equipped to start your Staking journey with ApeX.